Module 01

Exposure Basics: The Triangle in Practice

After this section you will be able to select simple aperture, shutter speed, and ISO combinations for everyday scenes and understand how they affect brightness and motion.

Illustration of the exposure triangle linking aperture, shutter speed, and ISO

Exposure module content

Understanding the Exposure Triangle

Exposure describes how bright or dark your photograph appears, and it is controlled by three connected settings: aperture, shutter speed, and ISO.

You can think of these three settings as sides of a triangle: if you change one side, at least one other side must adjust to keep the overall brightness similar.

  • Aperture controls how wide the lens opens and influences depth of field.
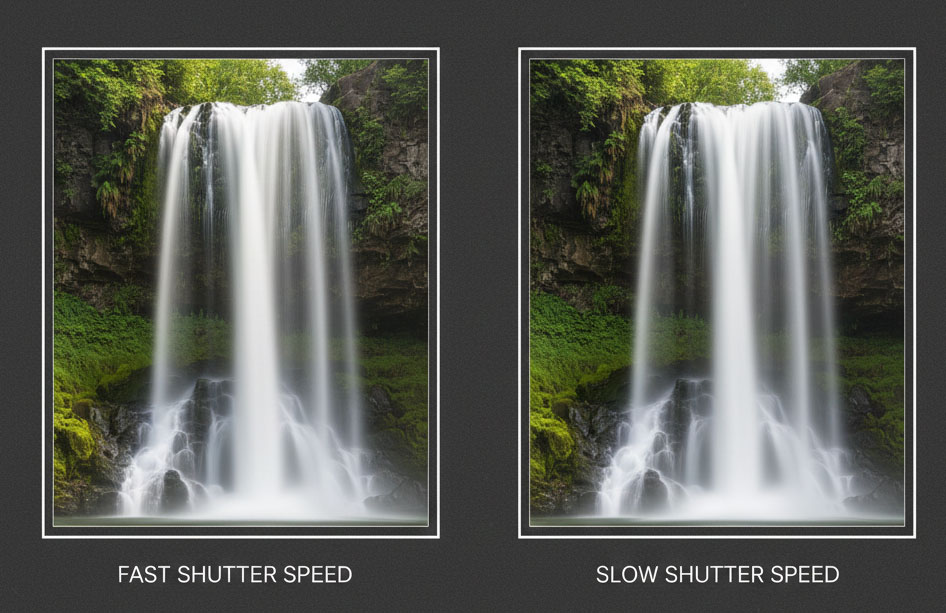
  • Shutter speed controls how long the sensor is exposed and influences motion blur.
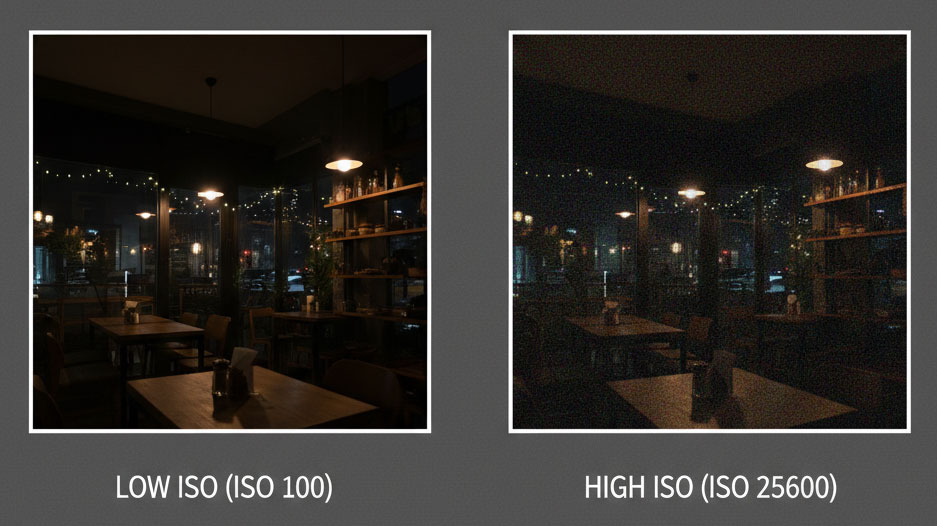
  • ISO controls how sensitive the sensor is to light and influences digital noise.

Aperture: Controlling Depth of Field

Aperture values are written as f-numbers (for example, f/1.8, f/4, f/11). Lower f-numbers mean a wider opening, which lets in more light and creates a shallow depth of field where the background becomes soft.

Higher f-numbers mean a narrower opening, which lets in less light and creates a deeper depth of field where more of the scene appears sharp from front to back.

Try this: Photograph a friend at f/2.8 and then at f/11 (or the closest values your camera offers) and compare how the background changes.

Two portraits side by side, one with blurred background and one with sharp background
Waterfall captured frozen with fast shutter speed and blurred with slow shutter speed

Shutter Speed: Freezing or Blurring Motion

Shutter speed is measured in fractions of a second, such as 1/1000 s or 1/30 s. Fast shutter speeds freeze motion, which is useful for sports, wildlife, or active children.

Slower shutter speeds allow more light in but make moving subjects blur, which you can use creatively for waterfalls, traffic trails, or intentional camera movement.

Try this: Photograph moving traffic at 1/500 s and again at 1/10 s while keeping the camera as steady as you can. Notice how motion feels different.

ISO: Sensitivity and Digital Noise

ISO values typically start around ISO 100 and increase in steps (ISO 400, ISO 1600, and so on). Higher ISO allows you to shoot in low light but introduces visible grain or noise.

A simple beginner rule is to keep ISO as low as possible while still maintaining a shutter speed that avoids unwanted blur.

Try this: Photograph the same indoor scene at ISO 100 and ISO 3200, then zoom in to compare how grainy the shadows look.

Side-by-side comparison of a low ISO clean image and a high ISO noisy image

Try It Now: Three Simple Setups

  1. Bright outdoor portrait: Use aperture priority mode, choose f/2.8–f/4, and keep ISO at 100–200.
  2. Indoor still life: Use shutter priority mode at 1/60 s, let the camera pick aperture, and increase ISO until the preview looks bright enough.
  3. Creative motion blur: Use shutter priority at 1/10 s, brace your camera, and photograph moving water or traffic.

Watch: A Beginner’s Guide to Exposure

Prefer to watch first? This short tutorial reinforces how aperture, shutter speed, and ISO work together.

Next module

Ready for the next step? Continue to Focus & Sharpness to make sure the right things stay sharp.